From an agent's account drop down menu, Settings: Application Criteria, the Guarantor option of the Application can be further managed. The article below describes the process for both the agent and the applicant:
- Guarantor OFF
- Activate on an as-needed basis
- Activated for single application
- Application Details: Guarantor ON
- Guarantor Invited
- Applicant can no longer login
Guarantor OFF
By toggling the Guarantor section OFF from the Application Criteria, the Application to Rent will no longer have the option to invite a Guarantor when an applicant initially submits their application. Guarantor can be found in Settings: Application Criteria.
An Additional Option will appear.

The Additional Option allows an agent to manage the Guarantor process on an as-needed basis.
Activate on an as-needed basis
By saving Activate on an as-needed basis, for all newly submitted applications an agent can then activate the Guarantor for a single application as needed.

Activate for single application
To activate the Guarantor for a single application, navigate to the Application Details by clicking on the applicant's name.
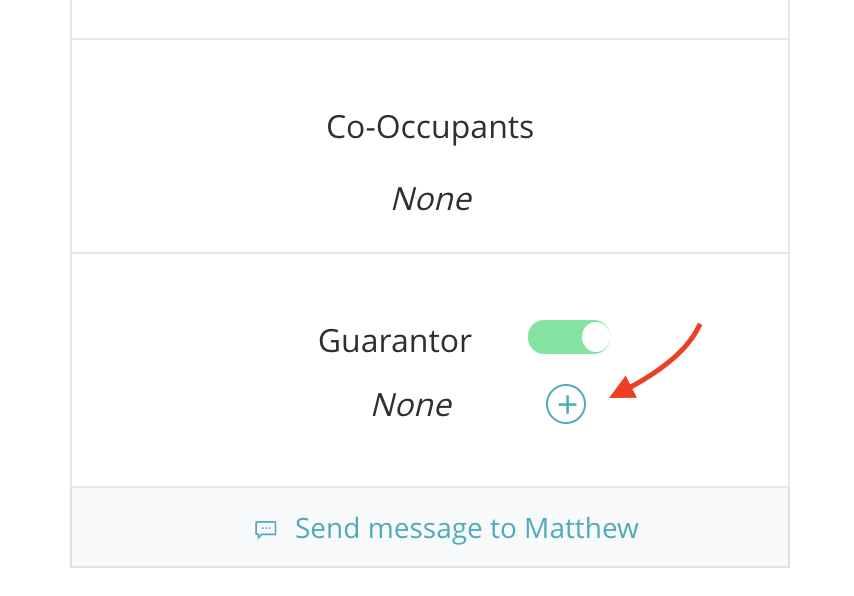
In the right panel within the Guarantor box, you'll see that the applicant's Guarantor section is Inactive. Inactive means the applicant cannot see or invite a Guarantor to apply.

Application Details: Guarantor ON
Once toggled ON, the applicant will now see the Guarantor section in their dashboard.

An agent will have two options:
- Agent enters/invites a Guarantor for the applicant by selecting +
- Ask the applicant to enter/invite their Guarantor from their dashboard
Agent enters/invites a Guarantor
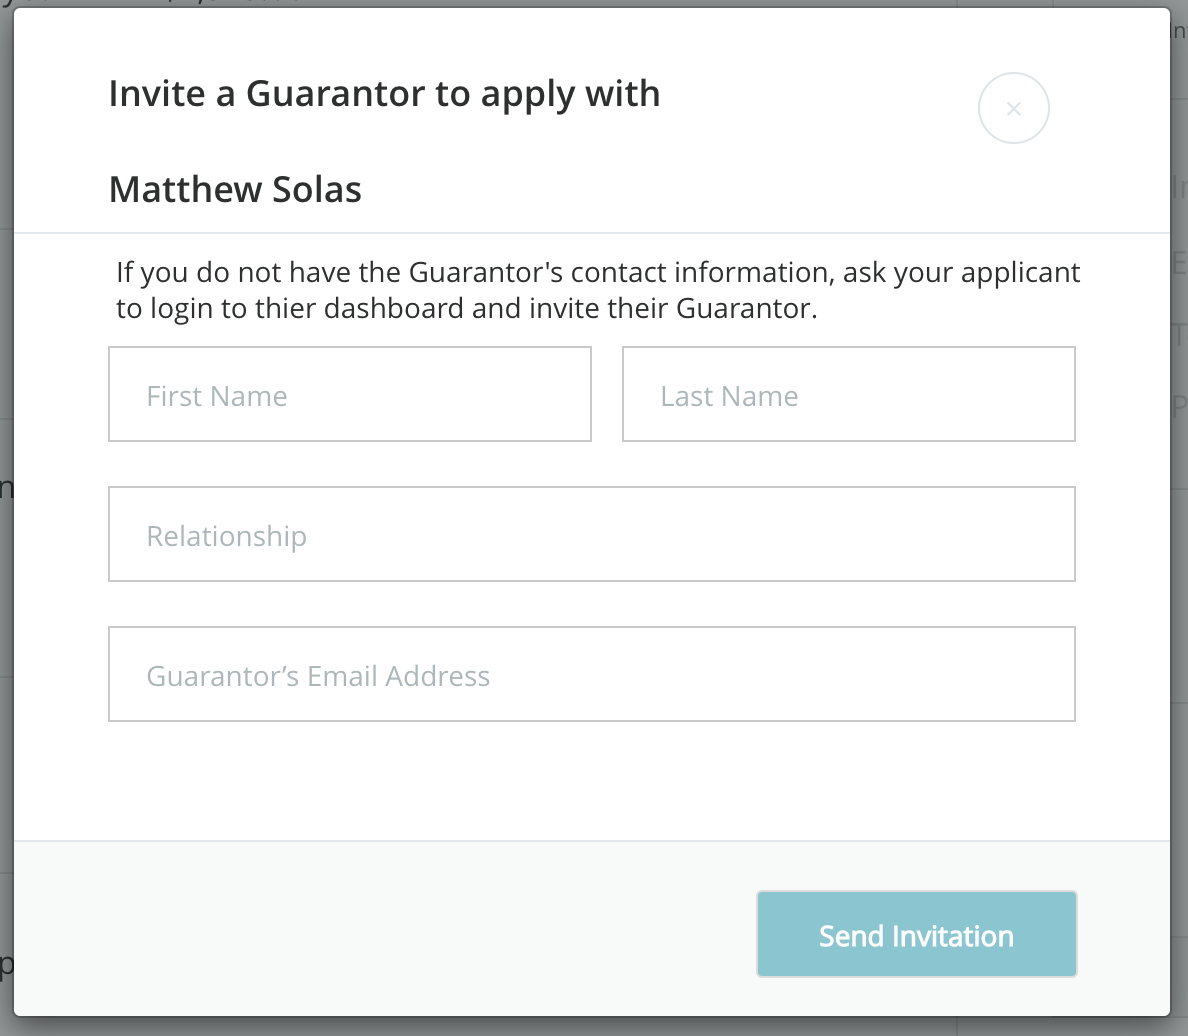
If the agent selects +, the agent can directly add the Guarantor. An invite modal will pop up, the Guarantor's First Name, Last Name and Relationship are optional, the Email Address is required.

Ask the applicant to enter/invite
Since the applicant can now see the Guarantor section on their dashboard, and if the agent does not have the Guarantor information, the applicant can invite a Guarantor by logging into their account and following the steps to add a Guarantor after an application is submitted.
Unlike the agent's optional fields, when an applicant invites a Guarantor, all contact details, first name, last name, relationship, are required.
Guarantor invited
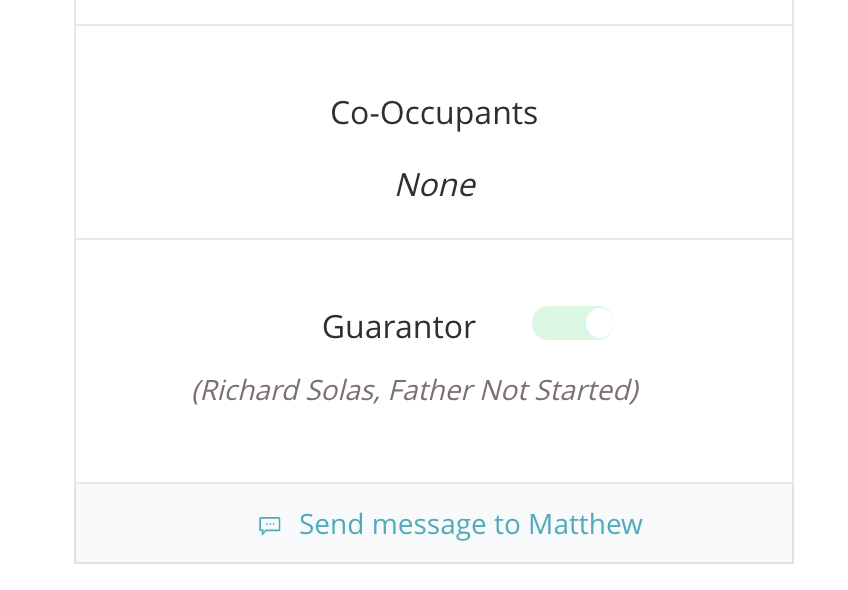
After a user has invited a Guarantor, the Guarantor will receive an email asking them to apply.

If entered, the contact details will be visible, and the Guarantor option in the Applicant Details will be disabled, only one Guarantor can be added per applicant.
If the contact details need to be edited, only the applicant can edit the contact details from their dashboard.
Applicant can no longer login
When an applicant is using their account to apply to multiple, non-associated, agents or properties, Intellirent may at times need to disable the applicant's account access.
If the applicant can no longer log into their submitted application, this does not limit your access to the application data, and our support team can help with any edits an applicant would need to make.
Consent to changes
If an application needs to be updated, it is required that the applicant themselves request the changes, as Intellirent's support team would need their consent to change their data.
Please ask the applicant to reach out to Intellirent's support team directly. The applicant should provide support with the agent and/or property data they are needing assistance with.
Still need help? Submit a support request here.