Do you have a Standard or Business Pro DocuSign account? If so, you can link your DocuSign and Intellirent accounts together. Once connected, all application data collected through Intellirent will auto-populate custom fields onto your lease documents within your DocuSign account.
Only DocuSign Organization Administrators can access activate the DocuSign integration. Please ensure your account is ready to accept integrations before activating.
In this article we'll cover:
- Activating the integration
- Managing Templates & Custom Fields
- Using the integration in Intellirent
- DocuSign Support
Activating the Integration
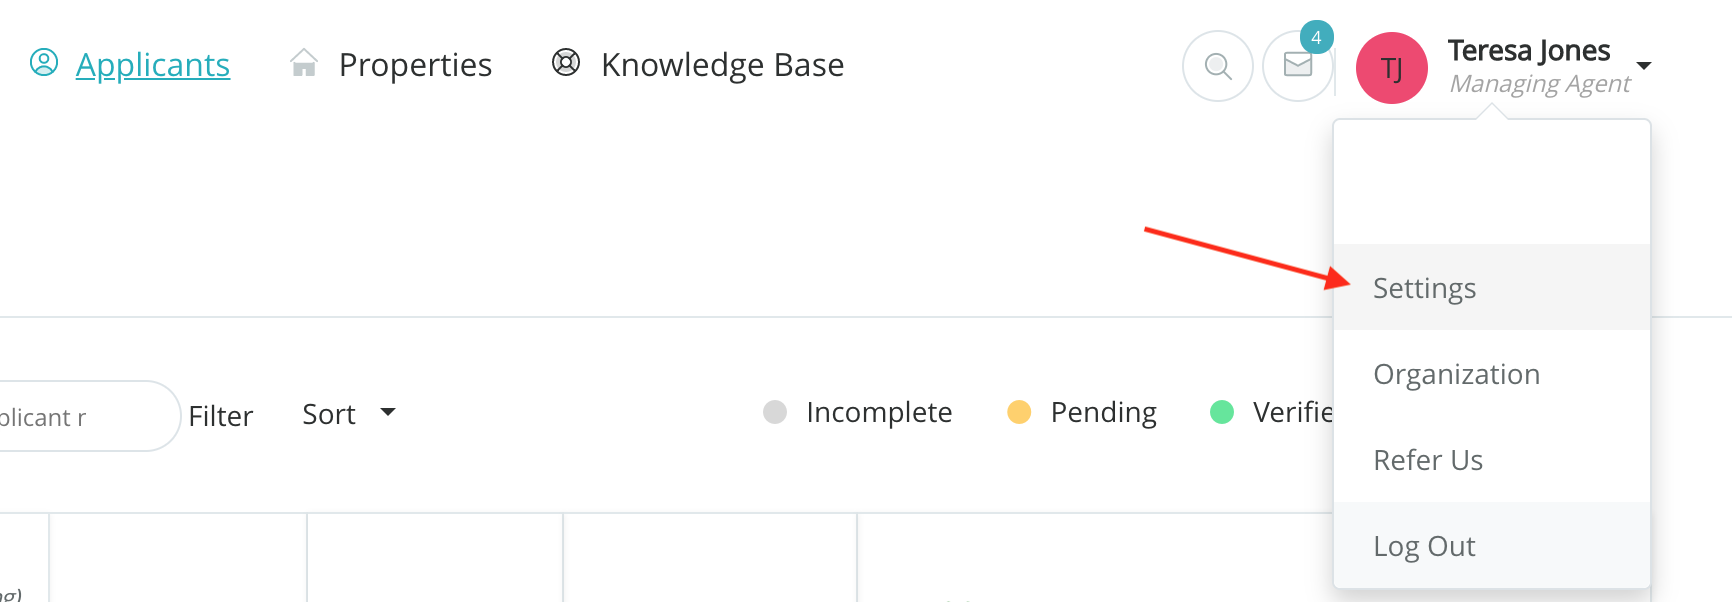
To begin, connect your DocuSign and Intellirent accounts by navigating to Settings using the drop down menu below your name.
Click on Integrations and scroll down to DocuSign.
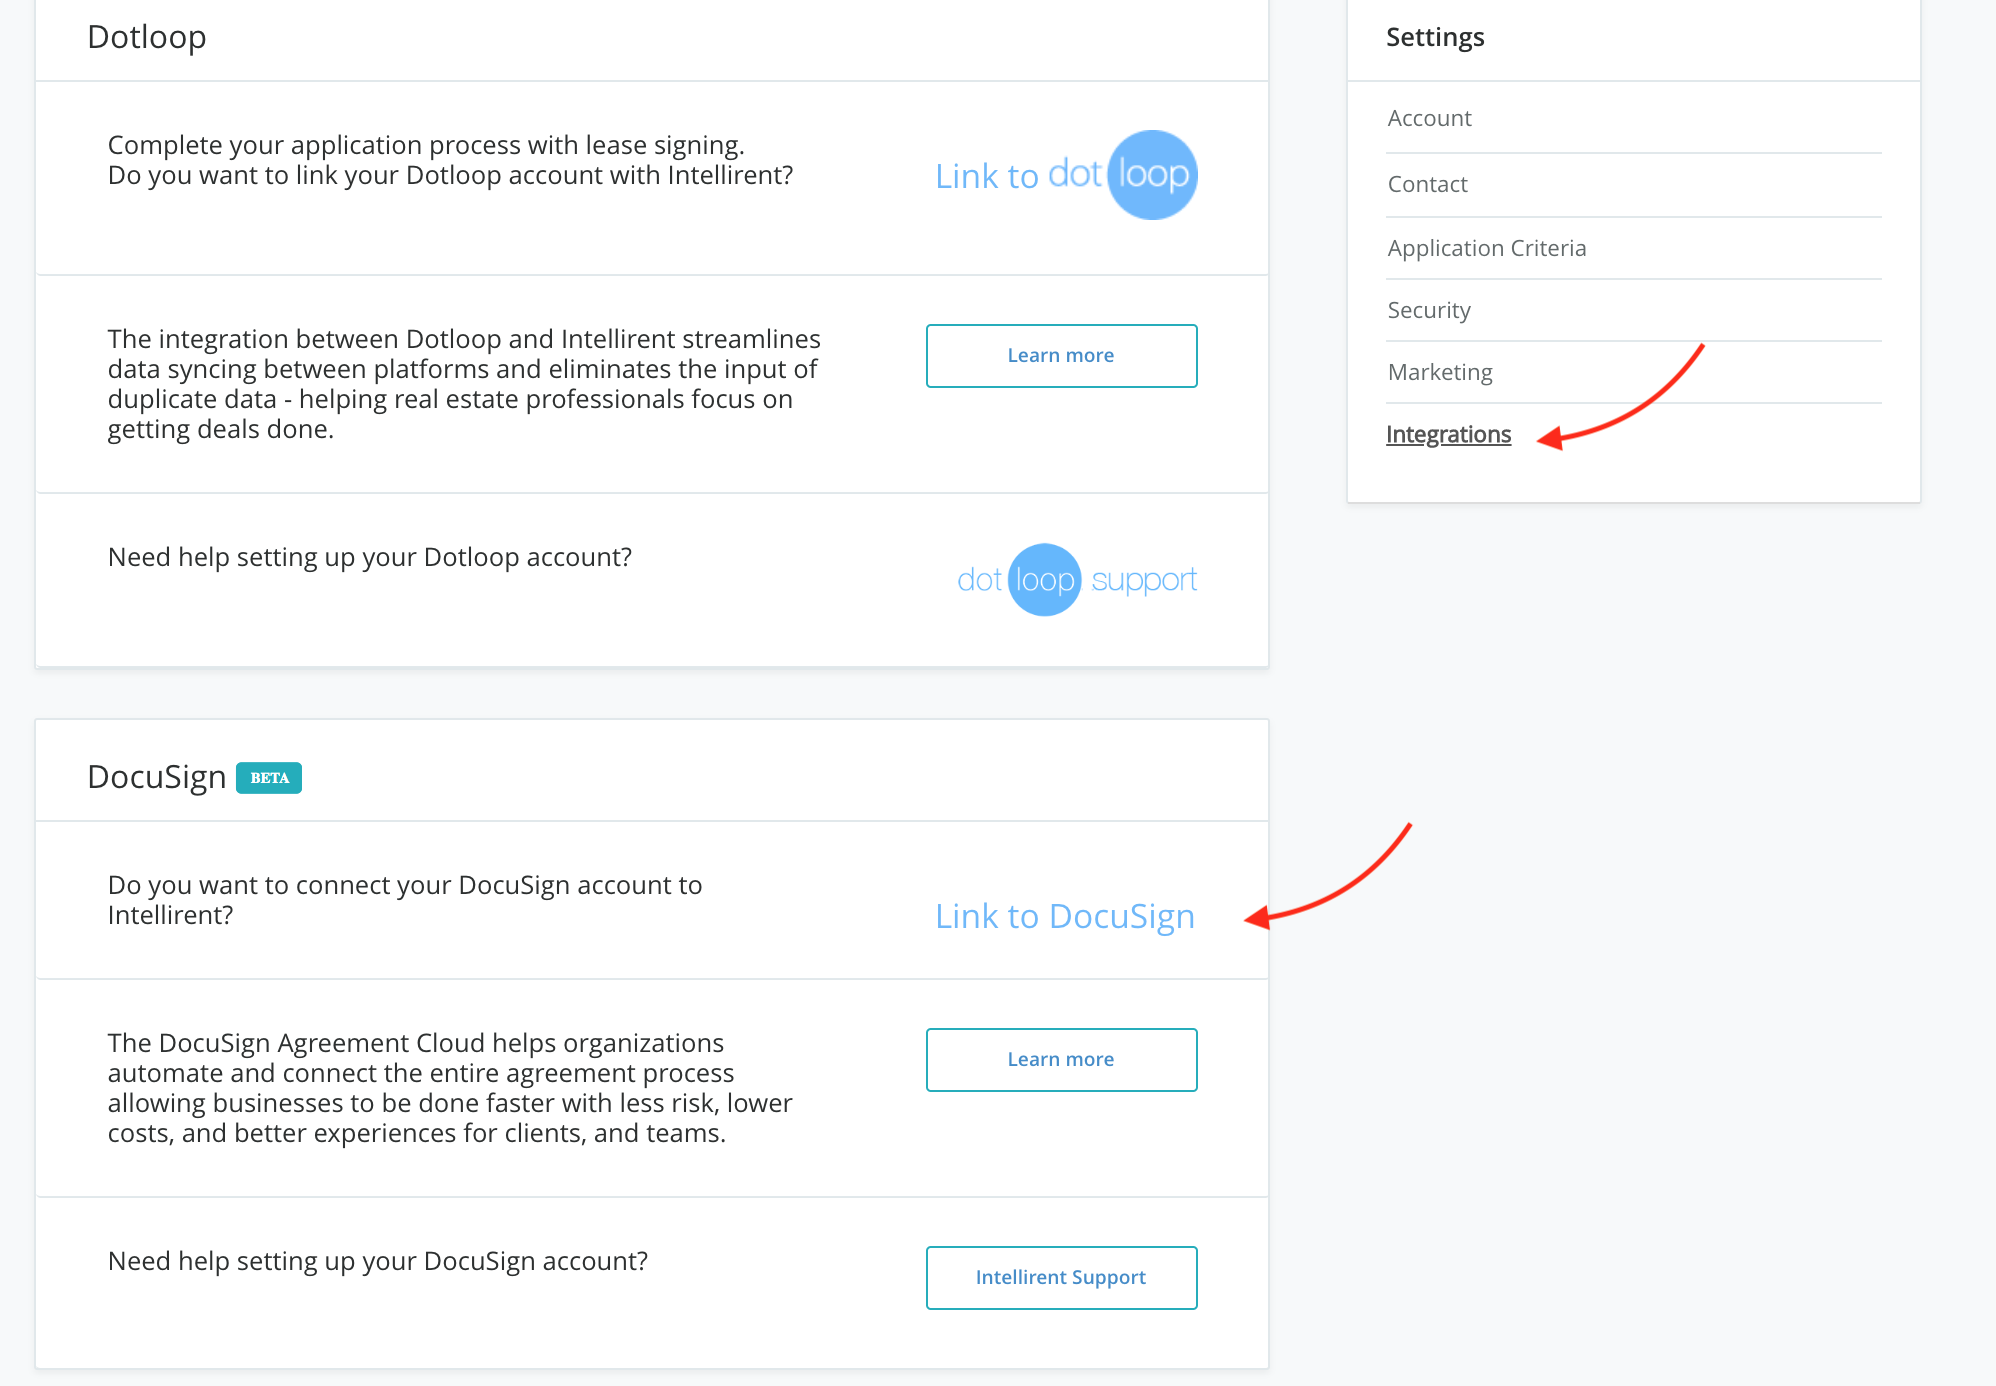
Click Link to DocuSign.
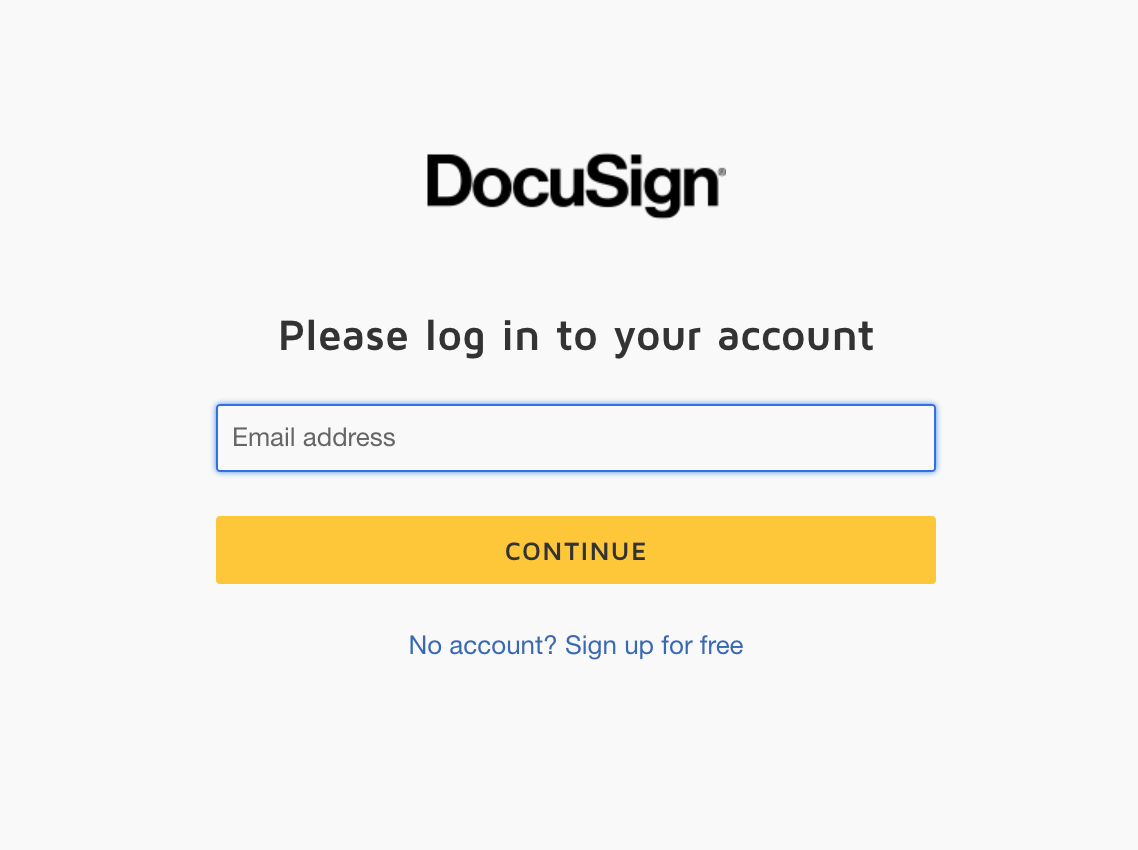
You may need to log back into DocuSign to authorize the integration.
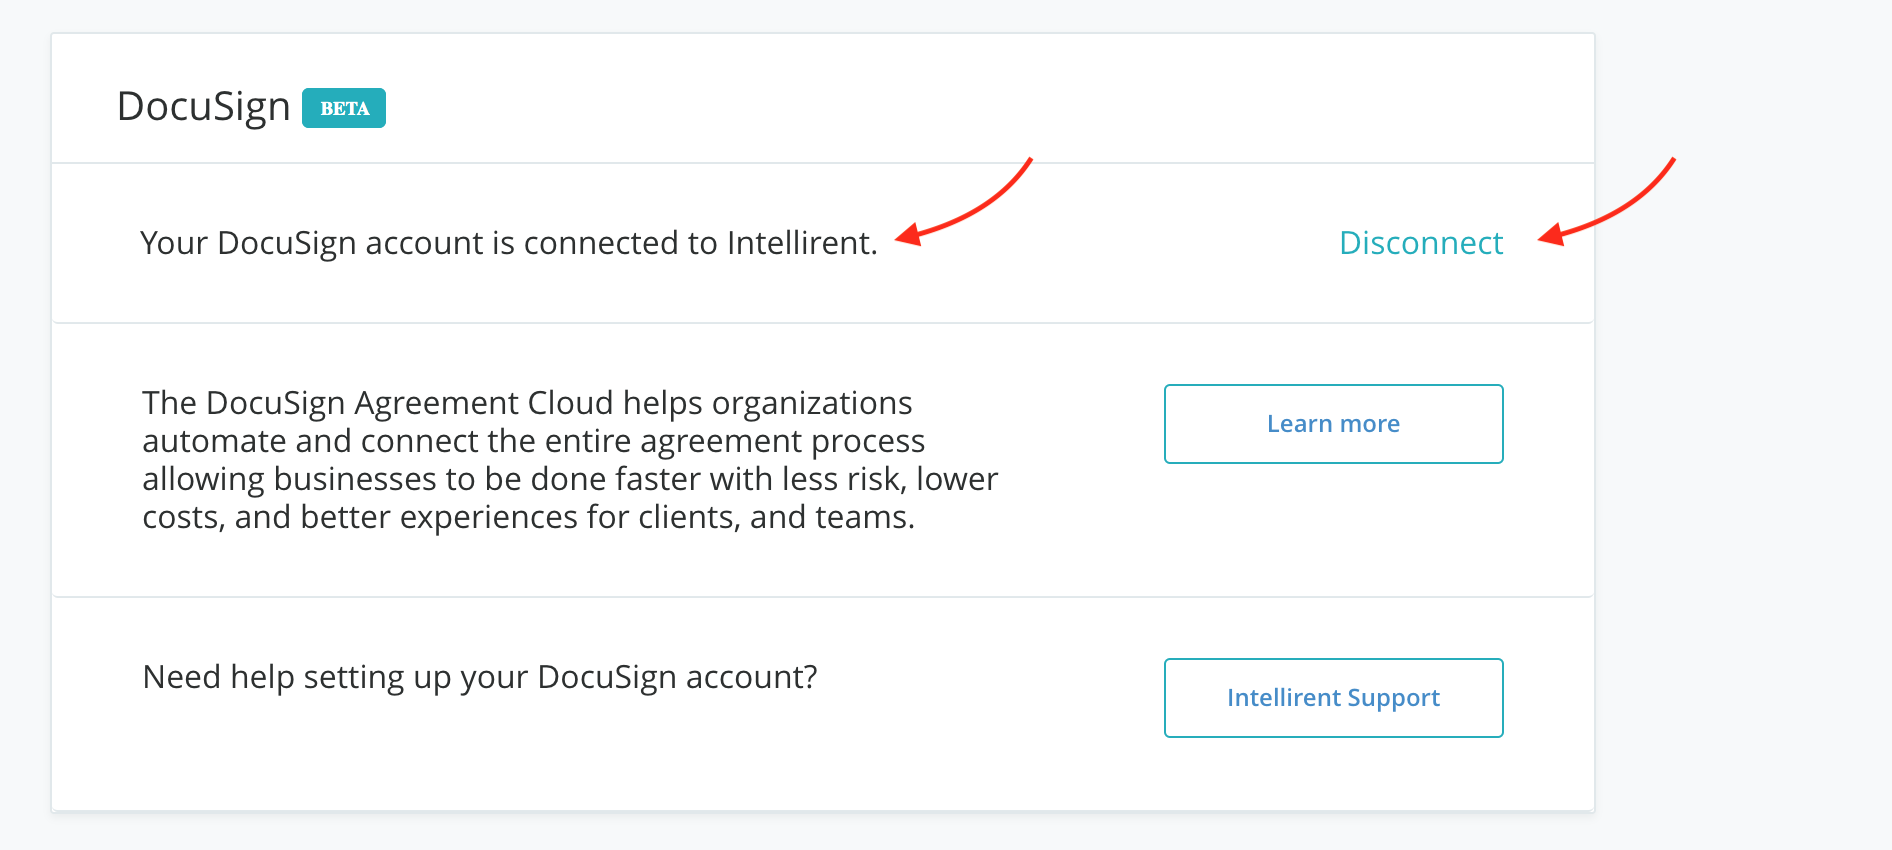
Once you have authorized the integration, your Intellirent and DocuSign accounts will be connected!
If you ever need to disconnect, simply click Disconnect.
Managing Templates & Custom Fields in DocuSign
Next, you will need to navigate back to your DocuSign account in order to add Custom Fields within your DocuSign templates.
When using the integration, you must set up at least one template in DocuSign, then add fields to the documents within the template. This must be done before attempting to transfer application data through the integration.
In DocuSign, edit the documents within a template and click on the icon for Custom Fields, this is directly below Standard Fields.
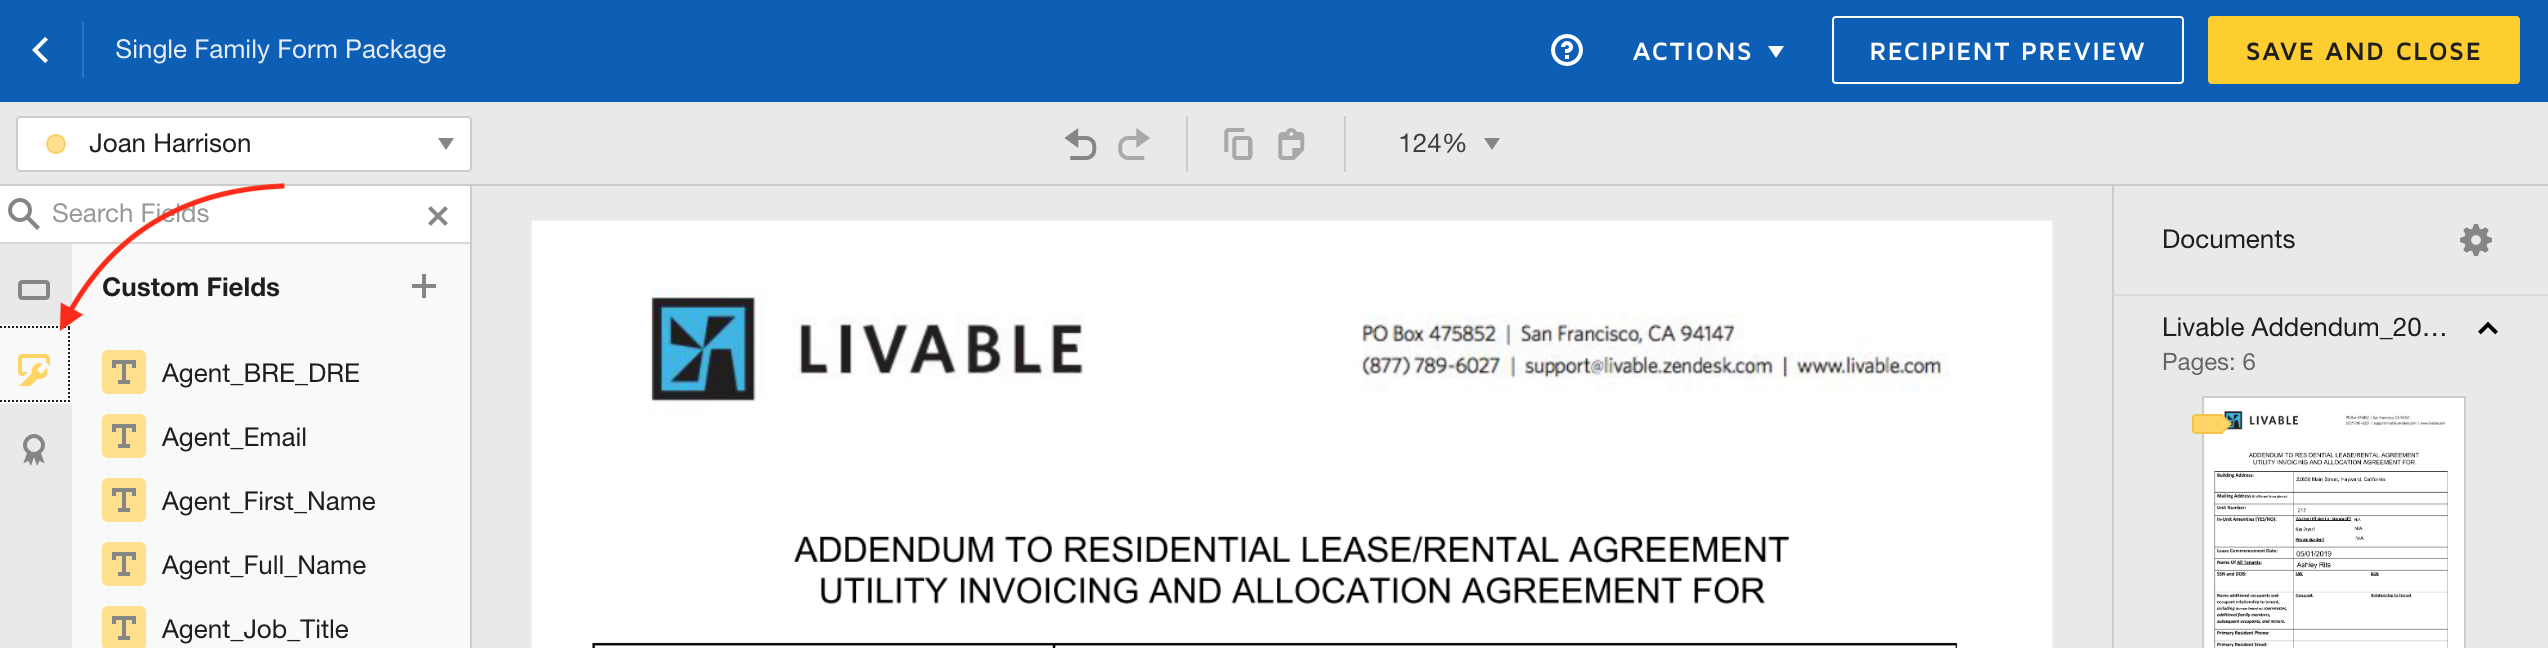
The Custom Fields are going to be specific to data collected in Intellirent. Only after your DocuSign and Intellirent accounts are linked will the Custom Fields populate within your DocuSign account.
All Custom Fields are in alphabetical order and align with the fields Intellirent collects from the agent and from the applicant. Search 'Applicant', 'CoOccupant', or 'Property' to view related Custom Fields.
Drag and drop desired fields, save, then head back into your Intellirent account to begin using the integration.
Using the Integration in Intellirent
Within your Intellirent account navigate to the Renter Resume of the desired application you would like to create a lease for. Once in the Renter Resume, you will see your active integrations at the top.

If you have more than one Integration activated, you will need to select from the Integrations drop down.

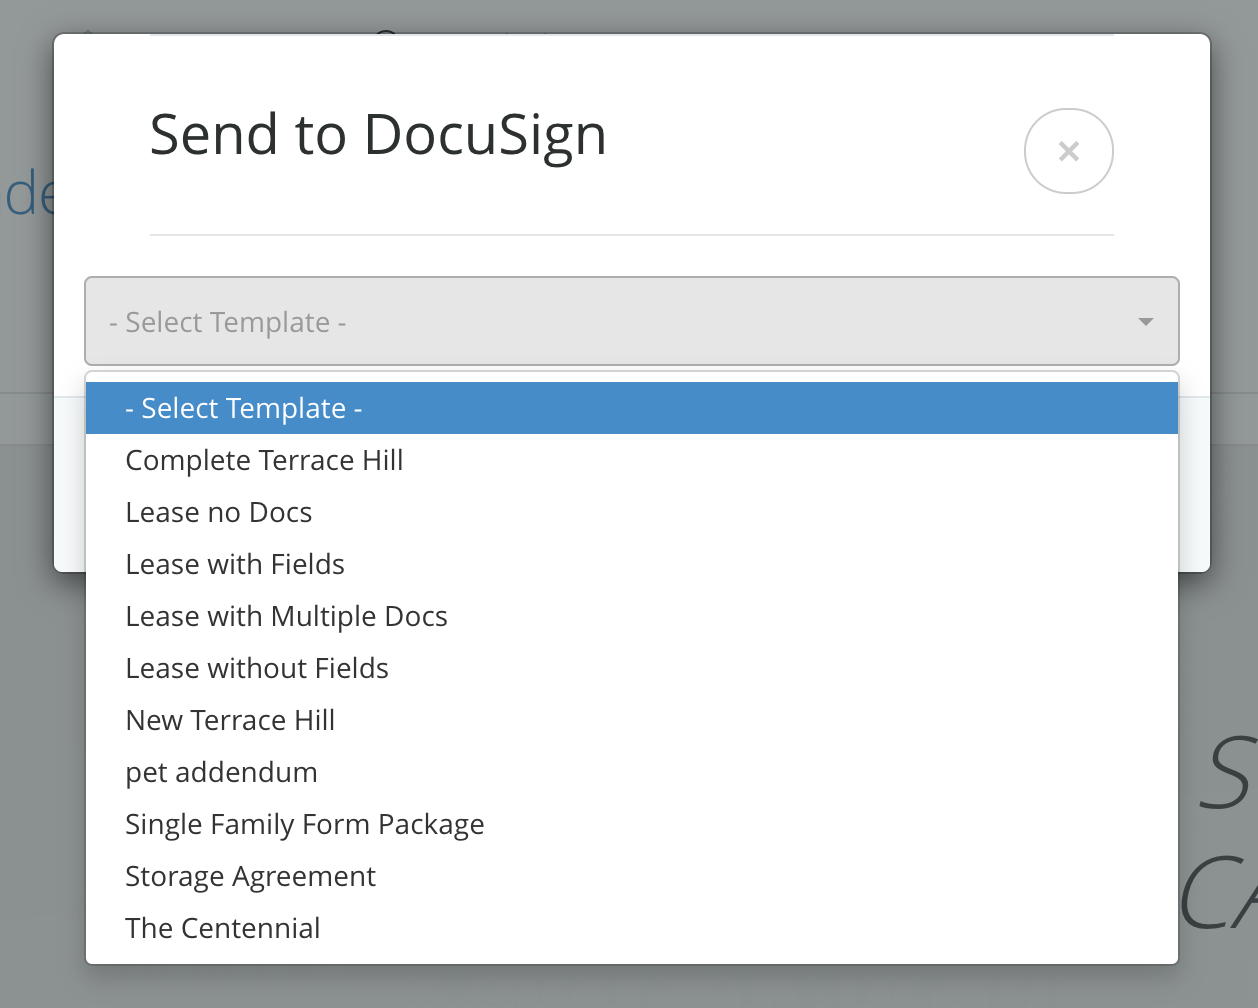
Click on the DocuSign logo to create your envelope for the application. A Send to DocuSign modal will pop up with a drop down of the templates you have already created in DocuSign.
From the modal, Select a Template.
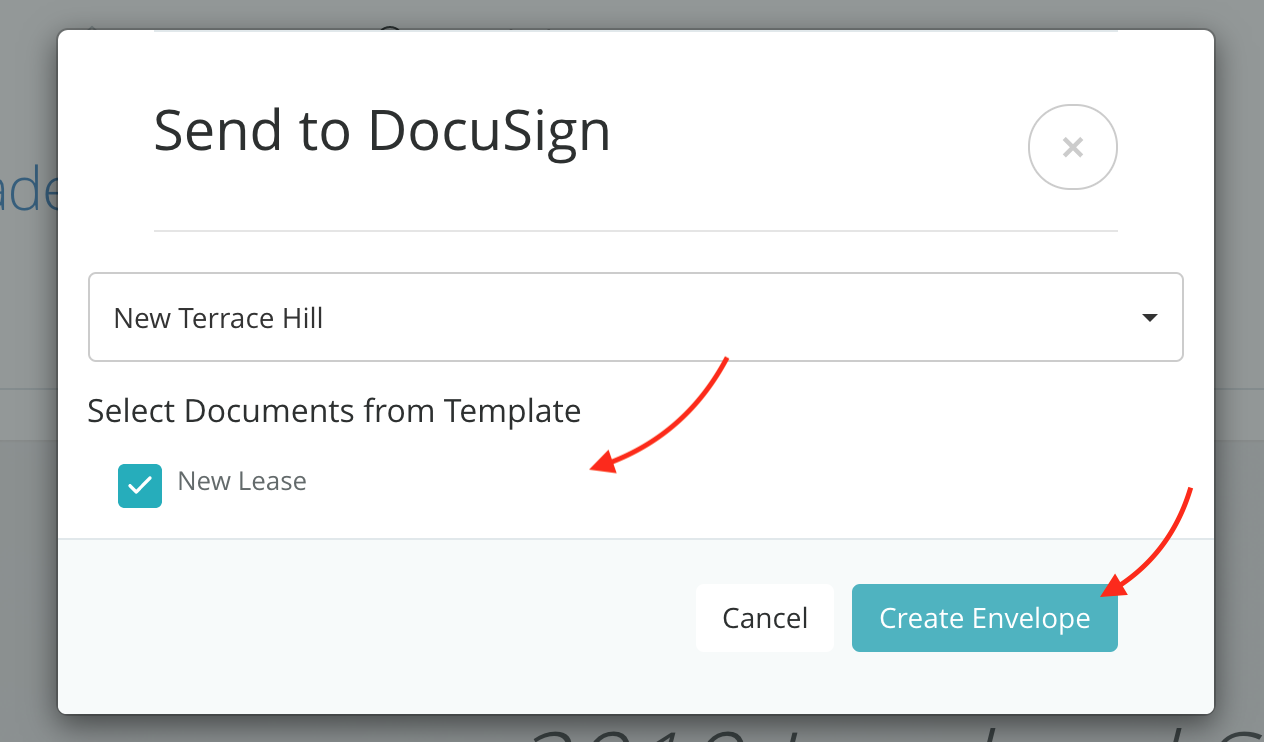
Then, Select a Document, and click Create Envelope.
Learn about adding one or more files to the template by following DocuSigns regular procedure described in Add Files.
Intellirent is now creating the DocuSign Envelope for you!
After the Envelope is ready, you will see a new icon to the left of the DocuSign logo. Click the blue envelope icon to access/open the envelope in DocuSign.
![]()
To create additional DocuSign Envelopes simply click the DocuSign logo again.
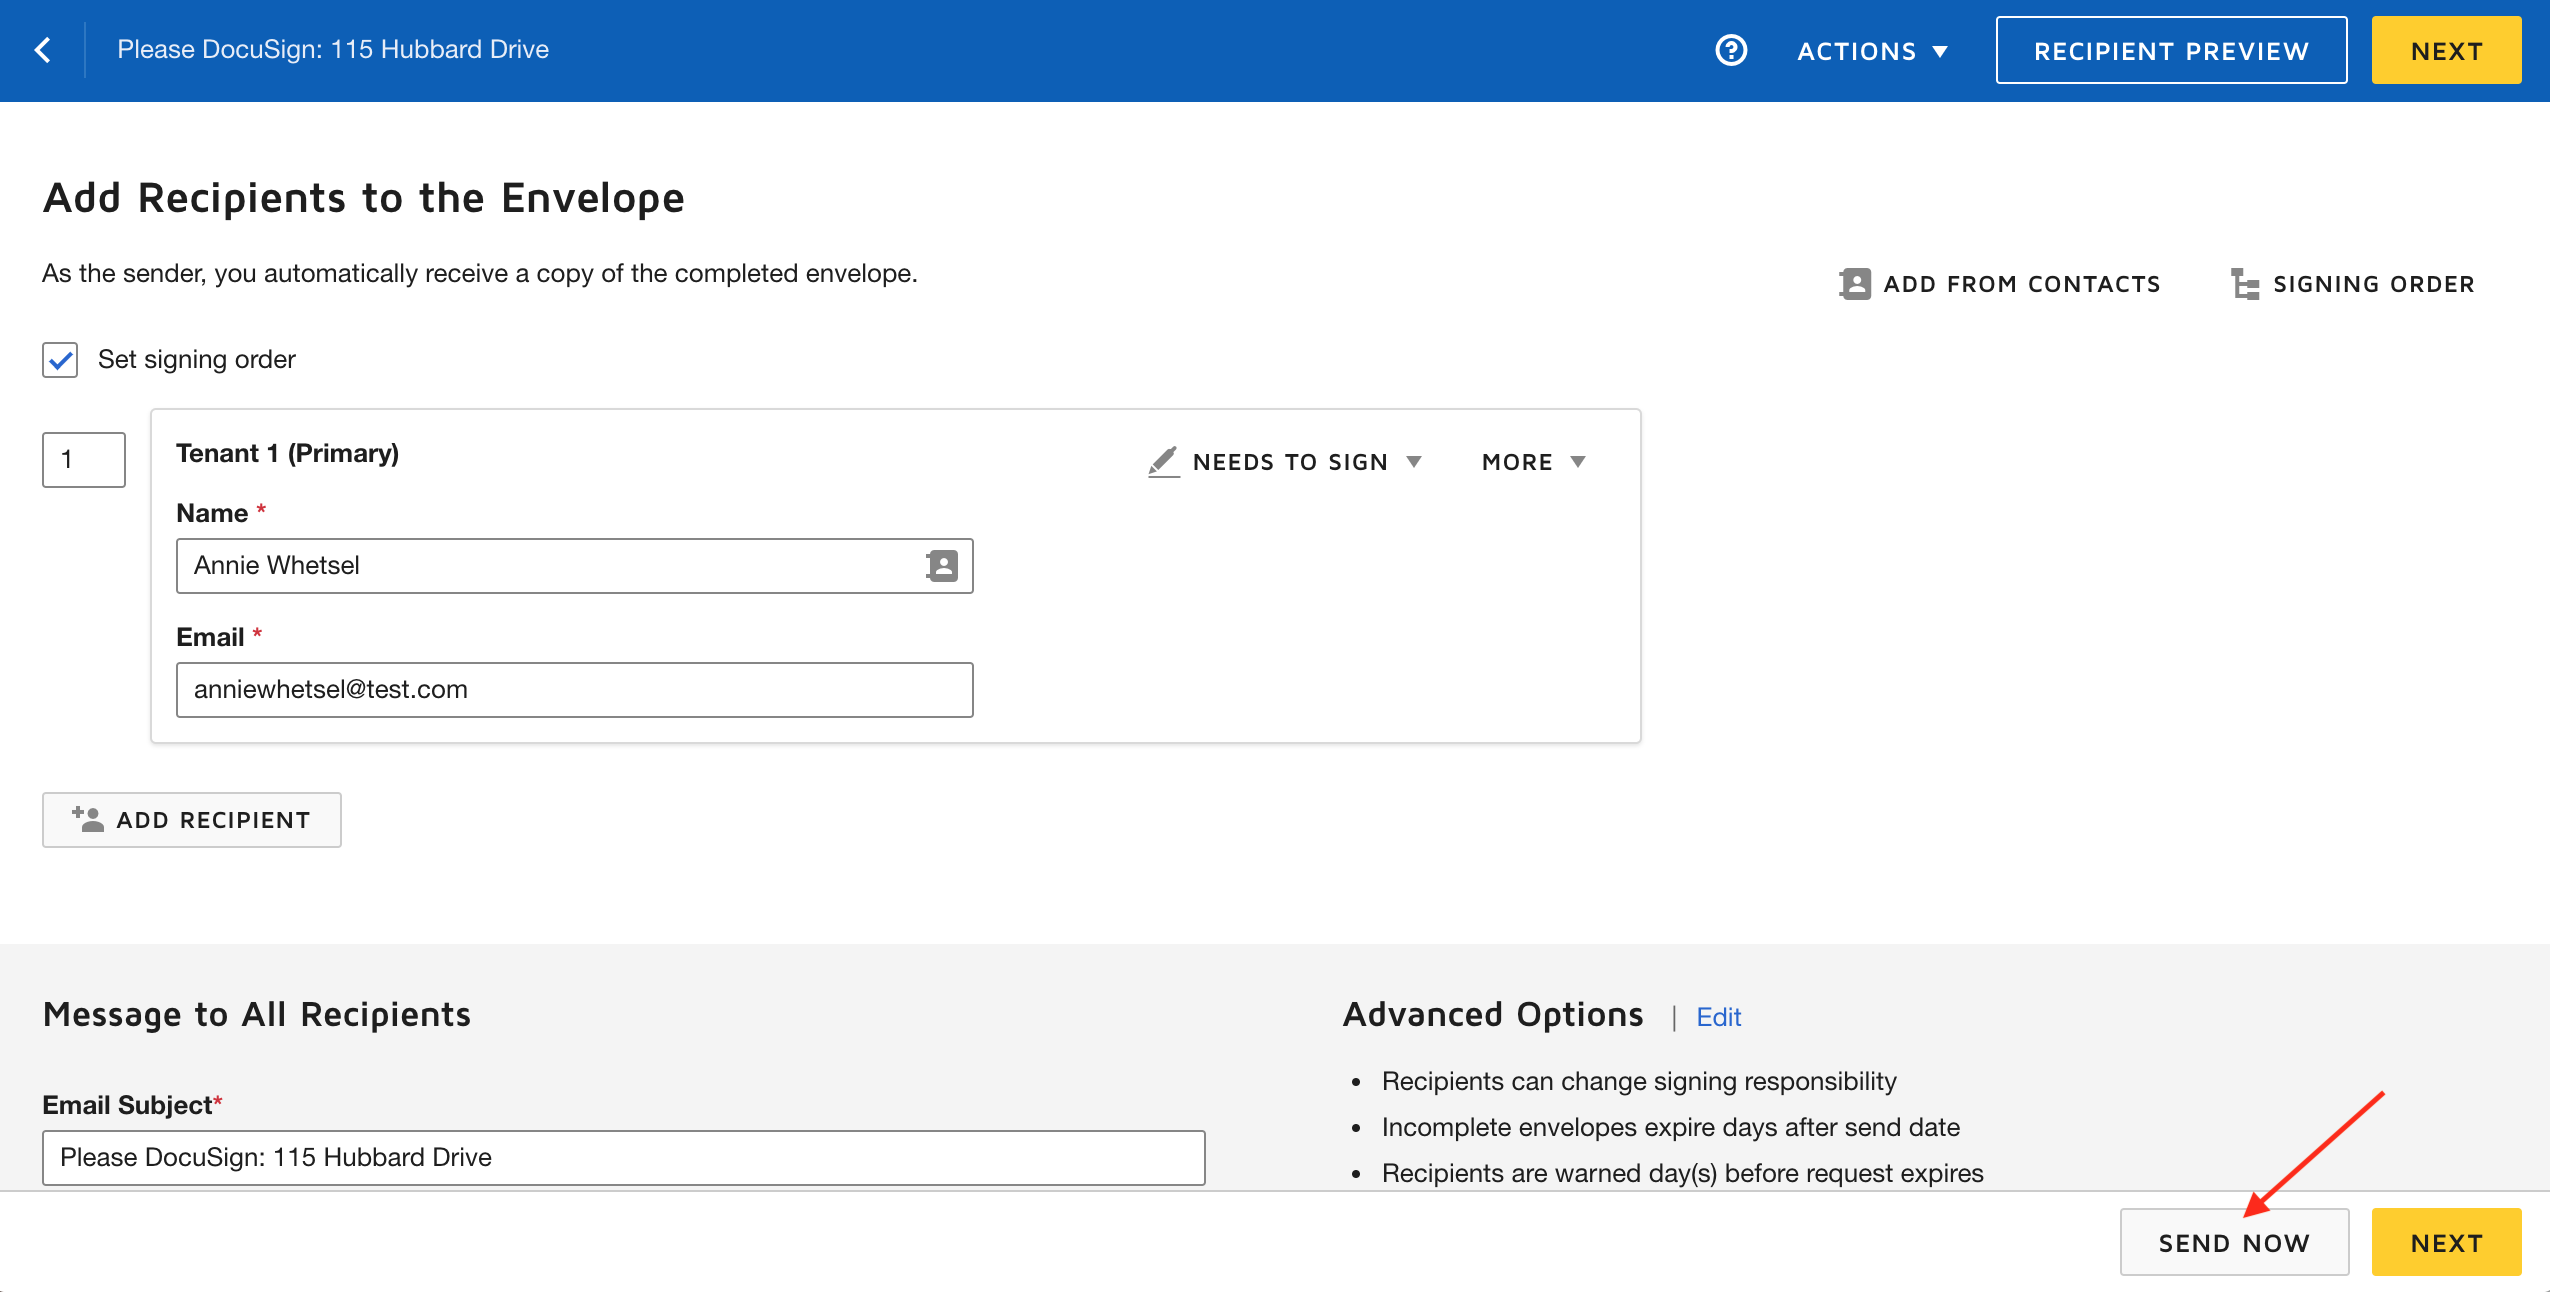
Clicking on the blue envelope icon will then take you to your DocuSign account where you will be able to review and send the envelope.
DocuSign Support
Agents can access DocuSign's support team online, over the phone, or live chat:
- DocuSign Support
- Support phone line: (206) 965-8590
- Users should have access to their DocuSign account ID for routing purposes.
- To find your DocuSign account number:
- First, log in to your DocuSign account.
- Click your profile image on the upper-right corner of the console. Your account number is under your name and/or organization name on the drop-down menu.
- To find your DocuSign account number:
Still need help? Submit a support request here.